4. Deployment Guide
Tài liệu triển khai hệ thống VCS M-Suite
1. Cài đặt mới
1.1. Chuẩn bị các điều kiện đảm bảo
1.1.1. Hardware requirement
1.1.1.1. Phân loại cấu hình server
- Loại A:
- CPU: 32 core vật lý
- RAM: 64 GB
- Loại B:
- CPU: 24 core vật lý
- RAM: 48 GB
- Loại C:
- CPU: 16 core vật lý
- RAM: 32 GB
- Loại D:
- CPU: 8 core vật lý
- RAM: 20 GB
1.1.1.2. Với mô hình AllInOne
Mặc định ubuntu 20 sẽ chỉ nhận 50% storage khi cài lvm nên cần lưu ý extend full luôn khi cài os.
1 x máy chủ (Controller + Gateway) -
swarmmanager01:Số concurrent users Loại server vật lý khuyên dùng HDD 0 -> 200 D 256GB 200 -> 1k C 512GB 1k -> 2k B 1TB 2k -> 10k A 2TB
1.1.1.3. Với mô hình HA6
2 x máy chủ HA -
node1,node2Số concurrent users Loại server vật lý khuyên dùng HDD 0 -> 2k D 128GB 2k -> 1k C 128GB 4 x máy chủ cụm (Controller + Gateway) -
node3,node4,node5,node6:Số concurrent users Loại server vật lý khuyên dùng HDD 0 -> 1k D 512GB 1k -> 2k C 1TB 2k -> 10k B 2TB
1.1.1.3. Với mô hình HA8
2 x máy chủ HA -
node1,node2Số concurrent users Loại server vật lý khuyên dùng HDD 0 -> 2k D 128GB 2k -> 10k C 128GB 3 x máy chủ cụm Controller -
node3,node4,node5:Số concurrent users Loại server vật lý khuyên dùng HDD 0 -> 1k D 512GB 1k -> 2k C 1TB 2k -> 10k B 2TB 3 x máy chủ cụm Gateway -
node6,node7,node8:Số concurrent users Loại server vật lý khuyên dùng HDD 0 -> 1k D 512GB 1k -> 2k C 512GB 2k -> 10k B 512GB
1.1.2. System requirement
- OS: Ubuntu Server 20.04
- User được cấp có quyền sudo
- Cấu hình: DNS, NTP
1.1.3. Network requirement
1.1.3.1. Kết nối
| Source | Destination | Port/Protocol | Description |
| Internet | Máy chủ AllInOne / VIP | 80/tcp 443/tcp | Public web interface |
| Internet | Máy chủ AllInOne / VIP | 8343/tcp | Public web service (Login, enrollment,...) |
| Internet | Máy chủ AllInOne / VIP | 8443/tcp | Private web service for enrolled clients (Device monitoring, ...) |
| Internet | Máy chủ AllInOne / VIP | 8183/udp 8143/tcp | Controller SDP implementation |
| Internet | Máy chủ AllInOne / VIP | 8283/udp 8243/tcp | Gateway SDP implementation |
| Internet | Máy chủ AllInOne / VIP | 53/udp | DNS Service |
| Cụm triển khai | Internet Proxy | System installation | |
| Máy chủ AllinOne/Gateway | Dịch vụ/Ứng dụng nội bộ | Application Access | |
| VCS | Cụm triển khai | 22/tcp 9777/tcp 9443/tcp | System Installation |
Lưu ý: các node trong cụm triển khai phải có cùng 1 dải mạng, nếu không cùng dải mạng thì cần mở các port sau cho tất cả các cặp node tương ứng
| Source | Destination | Port/Protocol | Description |
|---|---|---|---|
| node_x | node_y | 22/tcp | Ansible via SSH |
| node_x | node_y | 2376/tcp 2377/tcp 7946/tcp 7946/udp 4789/udp | Docker Swarm |
| node_x | node_y | 9568/tcp | RabbitMQ |
1.1.3.2. Public Domain và SSL Certificate
- 1 public domain: tạo 3 bản ghi DNS sau
- $DOMAIN_NAME -> $PUBLIC_IP
- pub.$DOMAIN_NAME -> $PUBLIC_IP
- priv.$DOMAIN_NAME -> $PUBLIC_IP
Ví dụ với public domain là msuite.mycompany.com thì cần tạo 3 bản ghi DNS là msuite.mycompany.com, pub.msuite.mycompany.com, priv.msuite.mycompany.com
- 1 SSL Certificate cho $DOMAIN_NAME
1.1.3.3. Mô hình
1.1.3.3.1. Với mô hình AllInOne

1.1.3.3.2. Với mô hình HA6
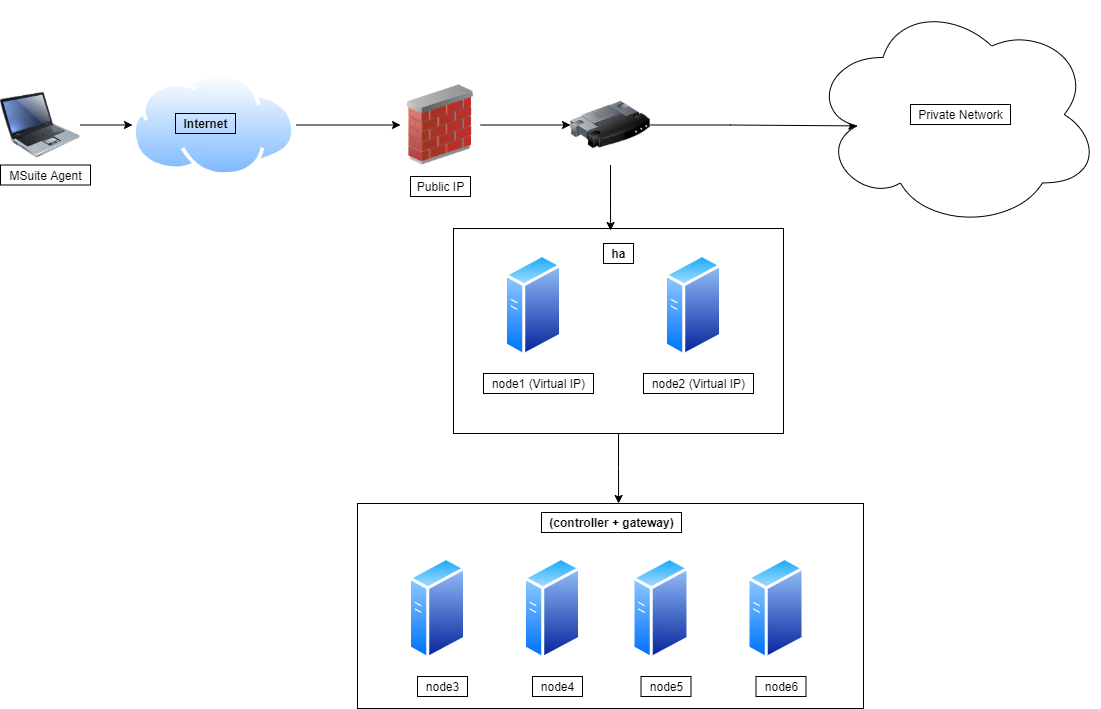
Lưu ý: Mô hình này cần 4 node services vì có một số service để HA được cần 4 máy chủ (rabbitmq)
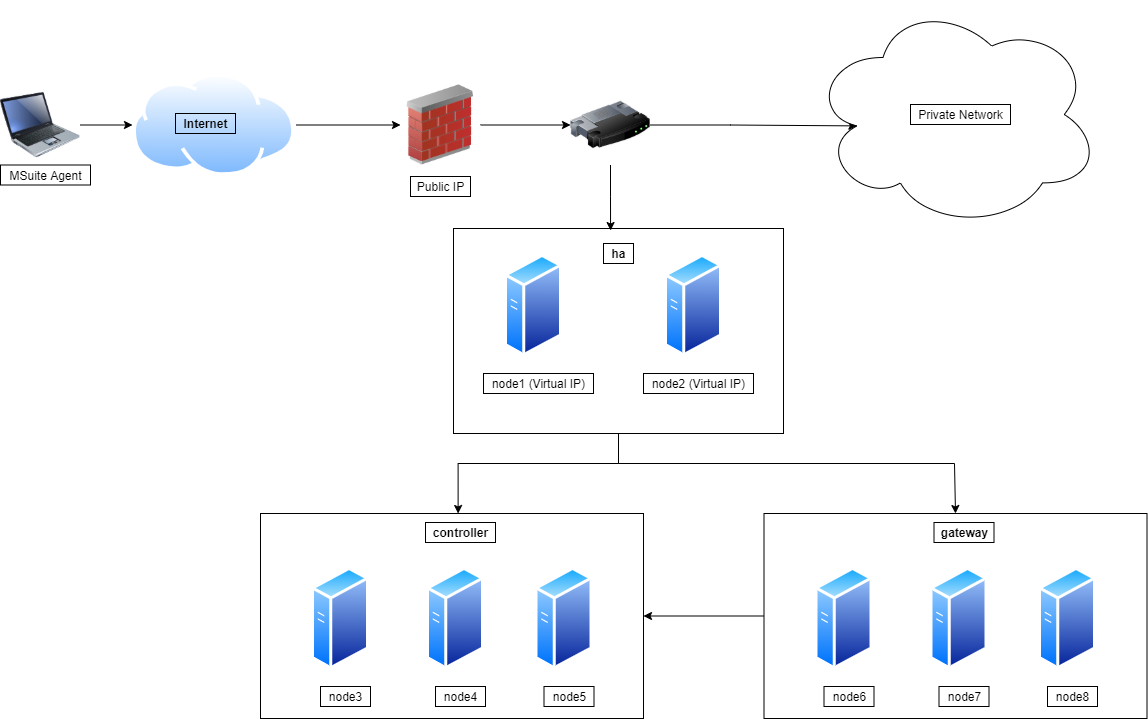
1.1.3.3.3. Với mô hình HA8
1.2. Chuẩn bị bộ cài
1.2.1. Tool Download
Download tool download bộ cài tại đây
1.2.2. Với bộ cài offline
- Download bộ cài mới nhất sử dụng tool download (với v2.0.6 là phiên bản muốn cài đặt)
bash download.sh zip v2.0.6
- Upload lên node triển khai (node AllInOne hoặc node3 với mô hình HA6 và HA8) và unzip ra thư mục generic
- Chạy các lệnh sau (sử dụng quyền root)
cd generic
mkdir -p /opt/mobility-suite/installer
cp -ar ./* /opt/mobility-suite/installer
chown -R <user>:<user> /opt/mobility-suite
cd /opt/mobility-suite/installer/web-based-installer
apt-get update
apt-get install -y nodejs sshpass ansible unzip ntp ntpdate
dpkg -i installer.deb
1.2.3. Với bộ cài online
- Download bộ cài mới nhất sử dụng tool download (với v2.0.6 là phiên bản muốn cài đặt)
bash download.sh online v2.0.6
Hoặc
wget https://github.com/mobility-suite/public-files/raw/master/installer.deb
- Upload lên node triển khai (node AllInOne hoặc node3 với mô hình HA6 và HA8)
- Chạy các lệnh sau (sử dụng quyền root)
apt-get update
apt-get install -y nodejs sshpass ansible unzip ntp ntpdate
dpkg -i installer.deb
1.2.4. Với bộ cài OVA
- Download bộ cài mới nhất sử dụng tool download (với v2.0.6 là phiên bản muốn cài đặt)
- VMWare:
bash download.sh ova-vmware v2.0.6
- Các nền tảng khác
bash download.sh ova-general v2.0.6
- Import file OVA, lưu ý:
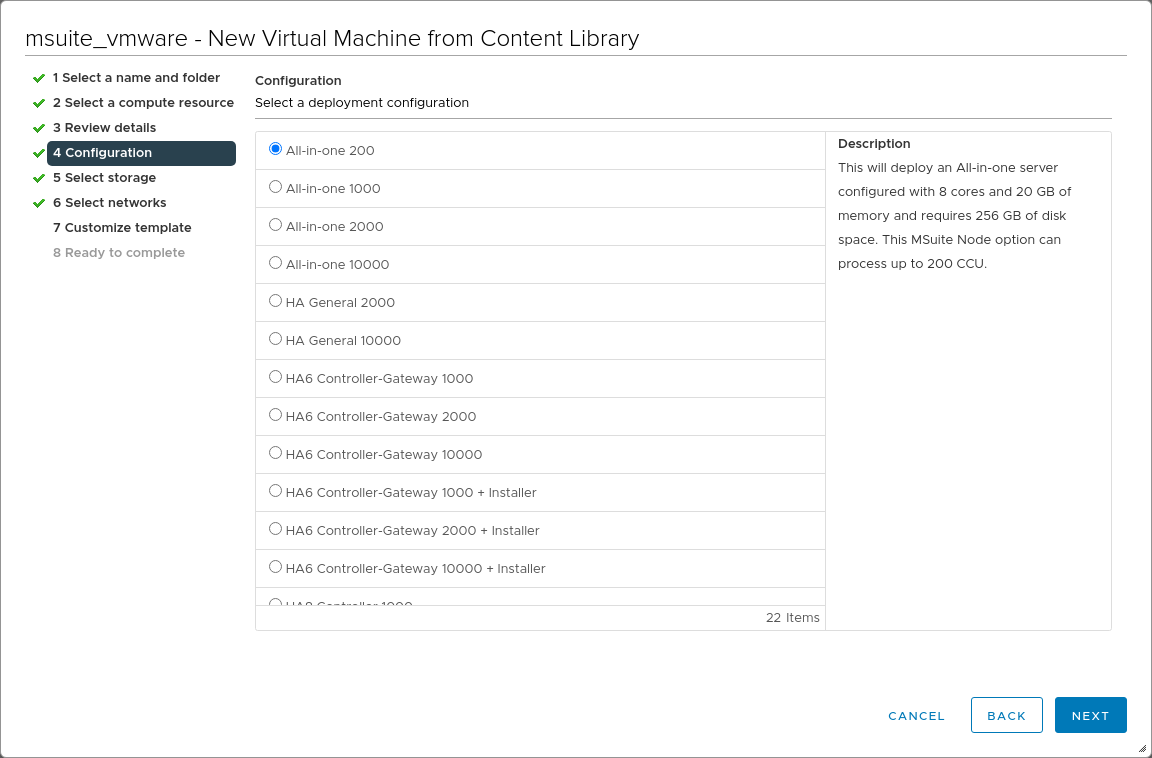
- VMWare
- Ở step Configuration: Chọn Deployment Configuration tương ứng với role đã định sẵn của node cần tạo, VMWare sẽ tự động cấu hình tài nguyên (RAM, CPU, HDD) cho node đó
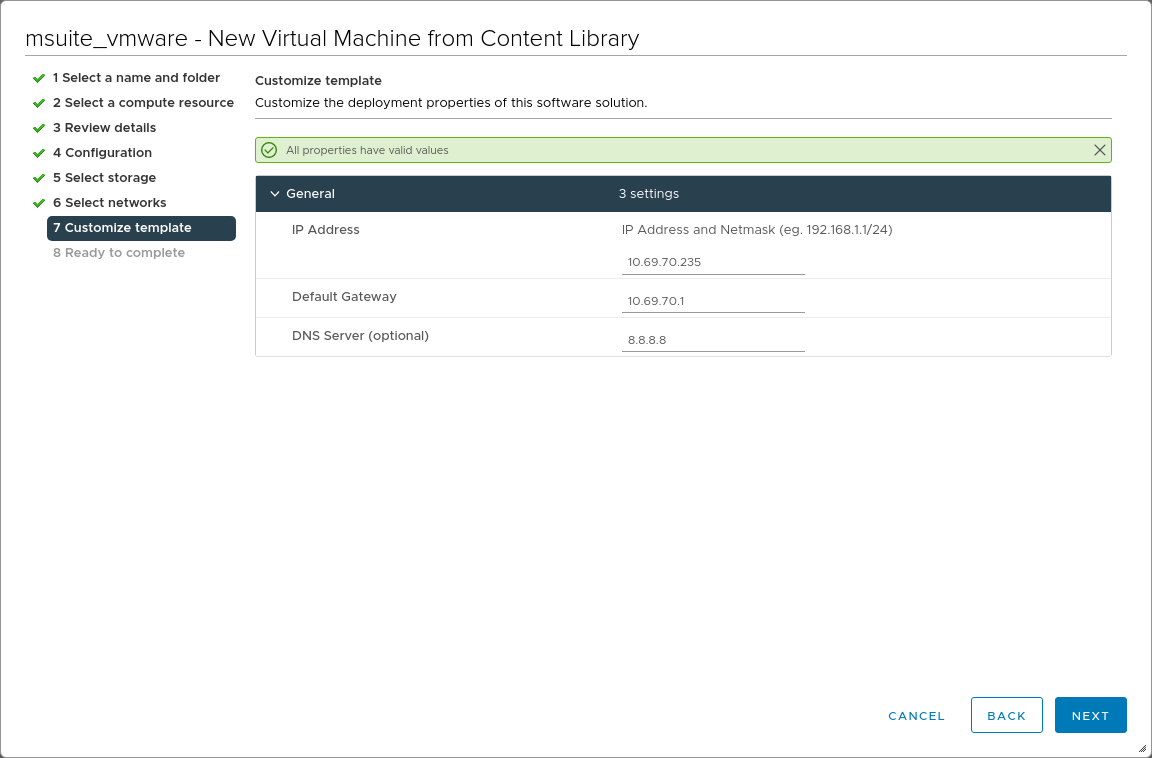
- VMWare
- Ở step Customize Template: Điền giá trị các Deployment Properties (bao gồm IP Address, Default Gateway, DNS Server) tương ứng với các giá trị định sẵn của node cần tạo, khi mở lên, VM sẽ tự động cấu hình các thông tin này
Format các giá trị này theo chuẩn của netplan: https://netplan.io/reference/
- Các nền tảng khác:
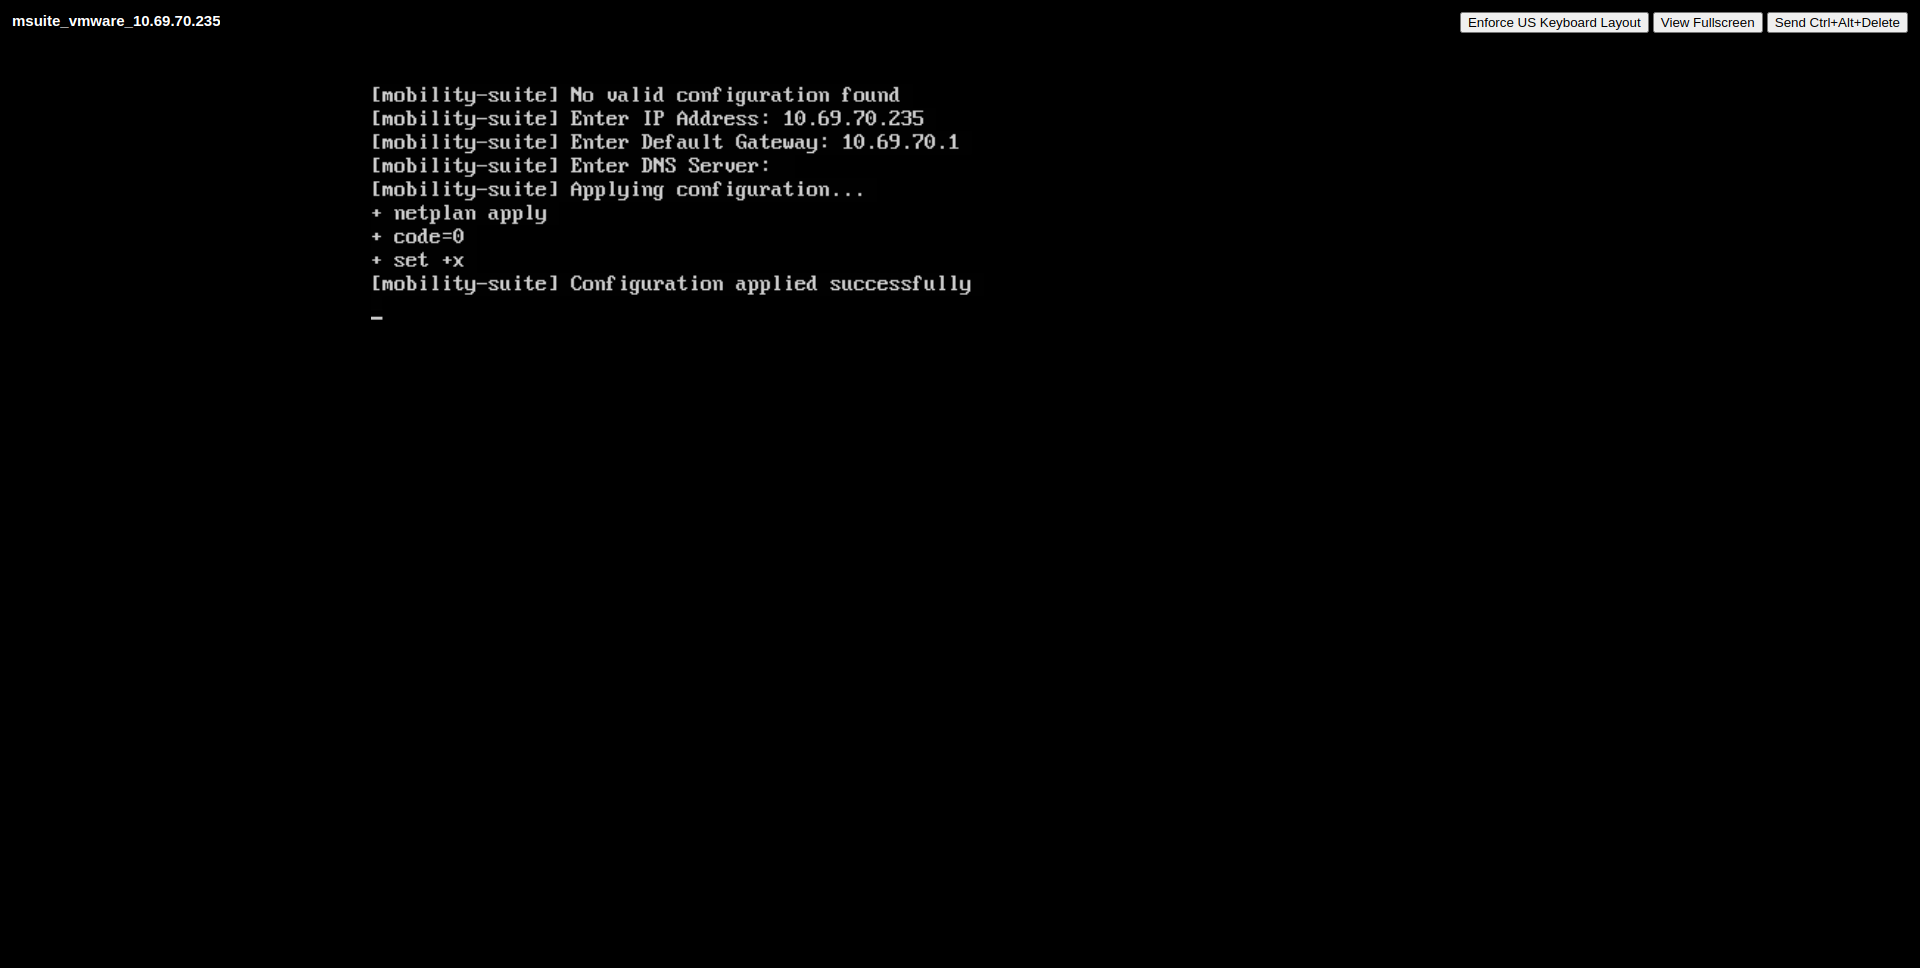
- Lần đầu mở VM lên, màn hình console sẽ hiện lên giao diện để cấu hình các thông tin cấu hình network (IP Address, Default Gateway, DNS Server). Nhập các giá trị định sẵn của node cần tạo, VM sẽ tự động cấu hình các thông tin này
- Các nền tảng khác:
Format các giá trị này theo chuẩn của netplan: https://netplan.io/reference/
1.3. Cài đặt
Truy cập https://$IP:9777 với $IP là IP của node AllInOne hoặc node3 trong chế độ HA6 và HA8
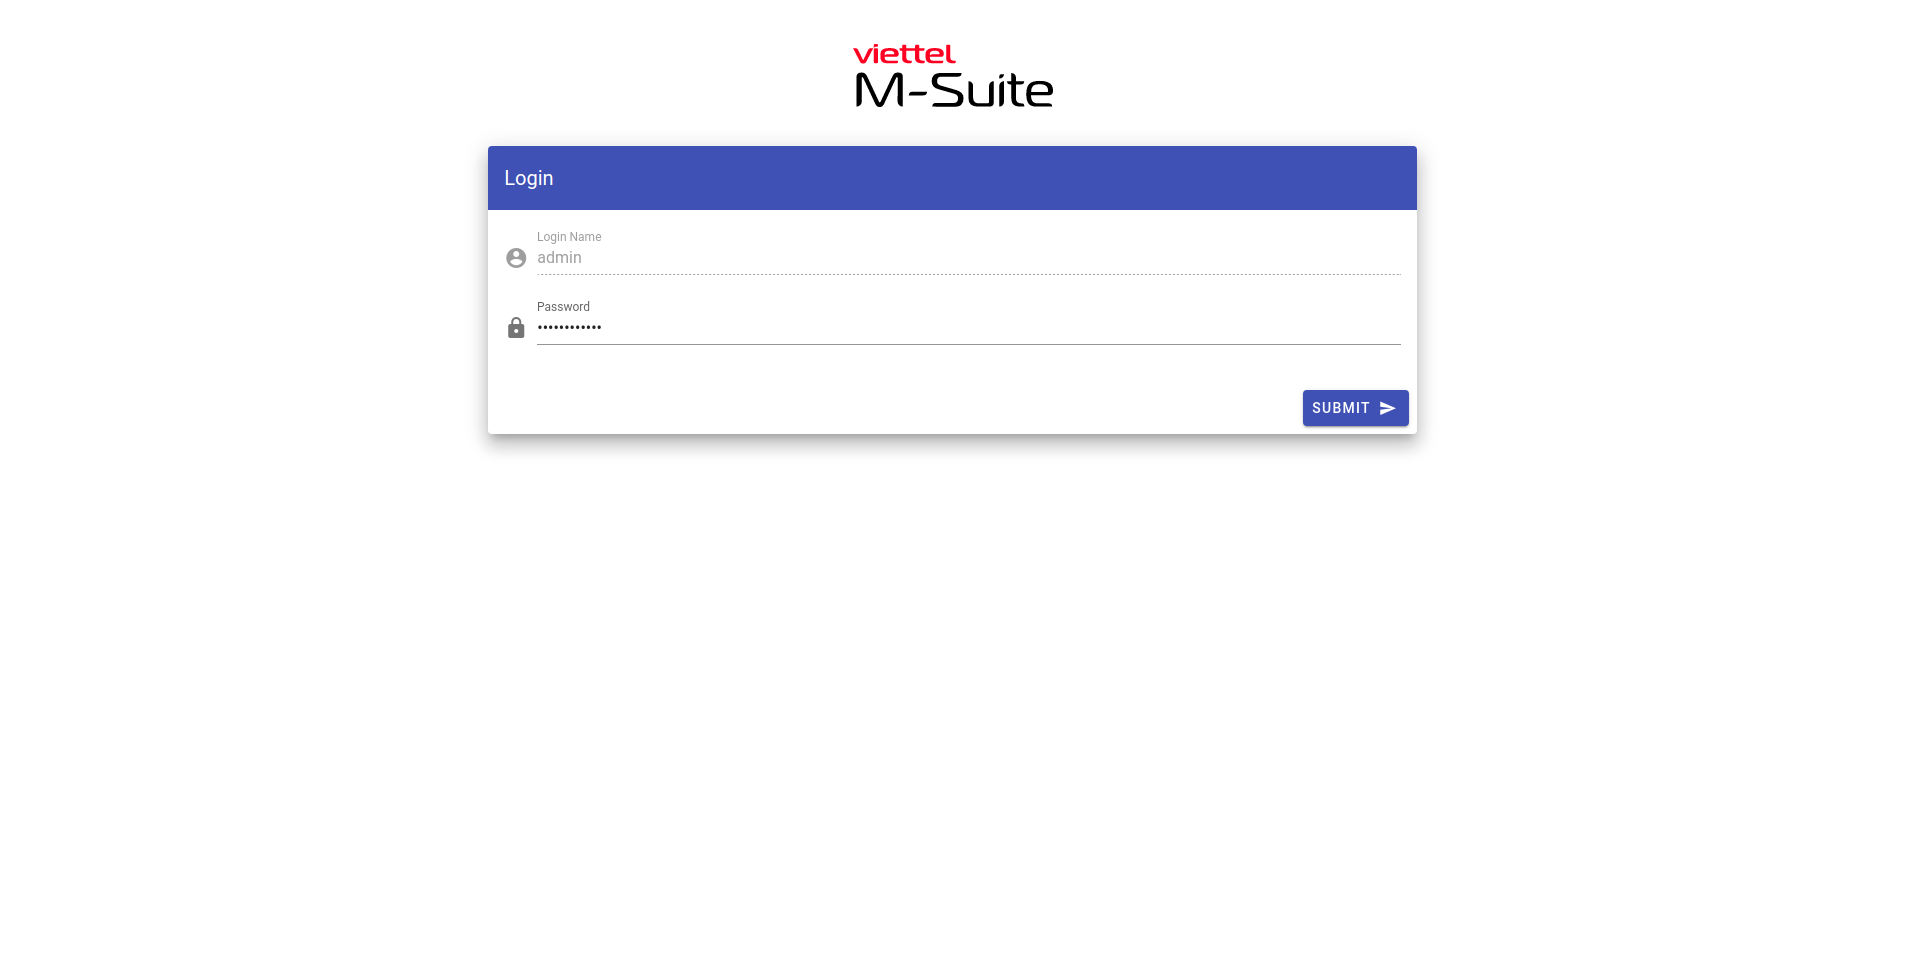
1.3.1. Tạo tài khoản cài đặt và đăng nhập
- Nhập Username / Password
- Click Submit

- Nhập Password
- Click Submit
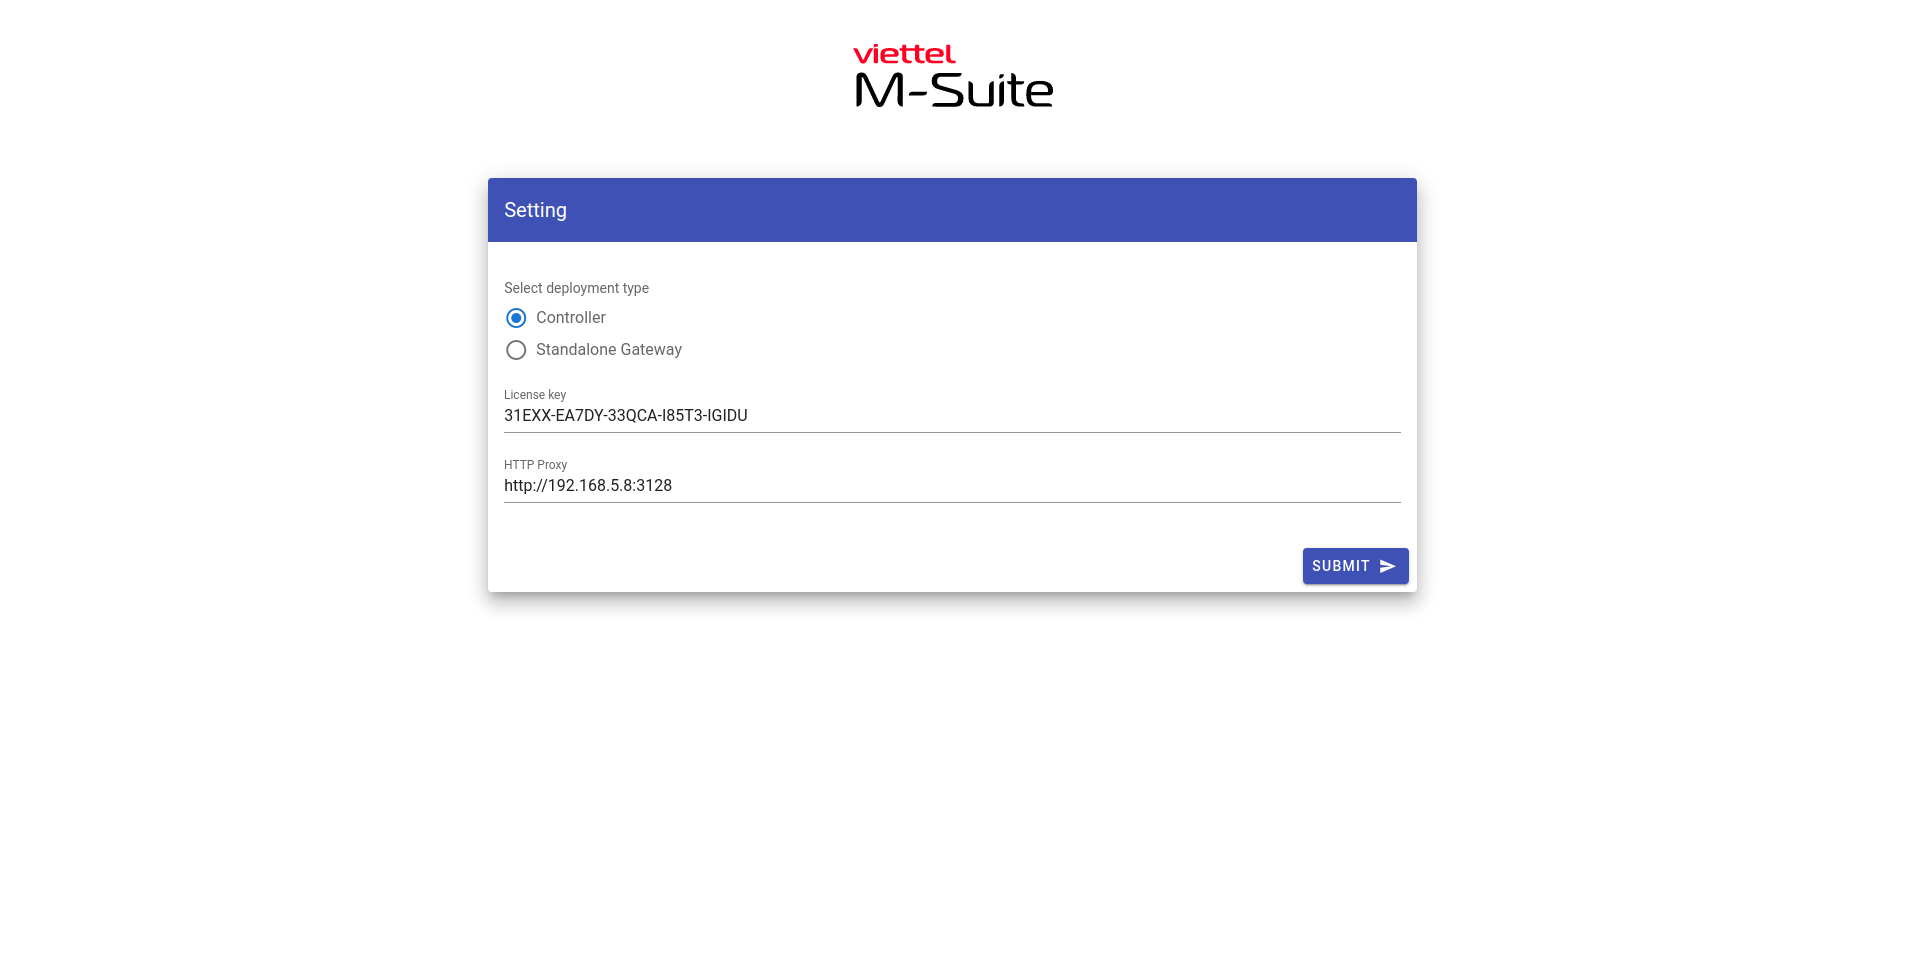
1.3.2. Chọn chế độ cài đặt
- Nhập các thông tin tương ứng với môi trường triển khai
- Click Submit
Chi tiết các trường
- Deployment type: chọn Controller
- License key: License key đi theo hợp đồng phần mềm, dùng để download bộ cài nếu cần
- HTTP Proxy: Proxy có kết nối internet
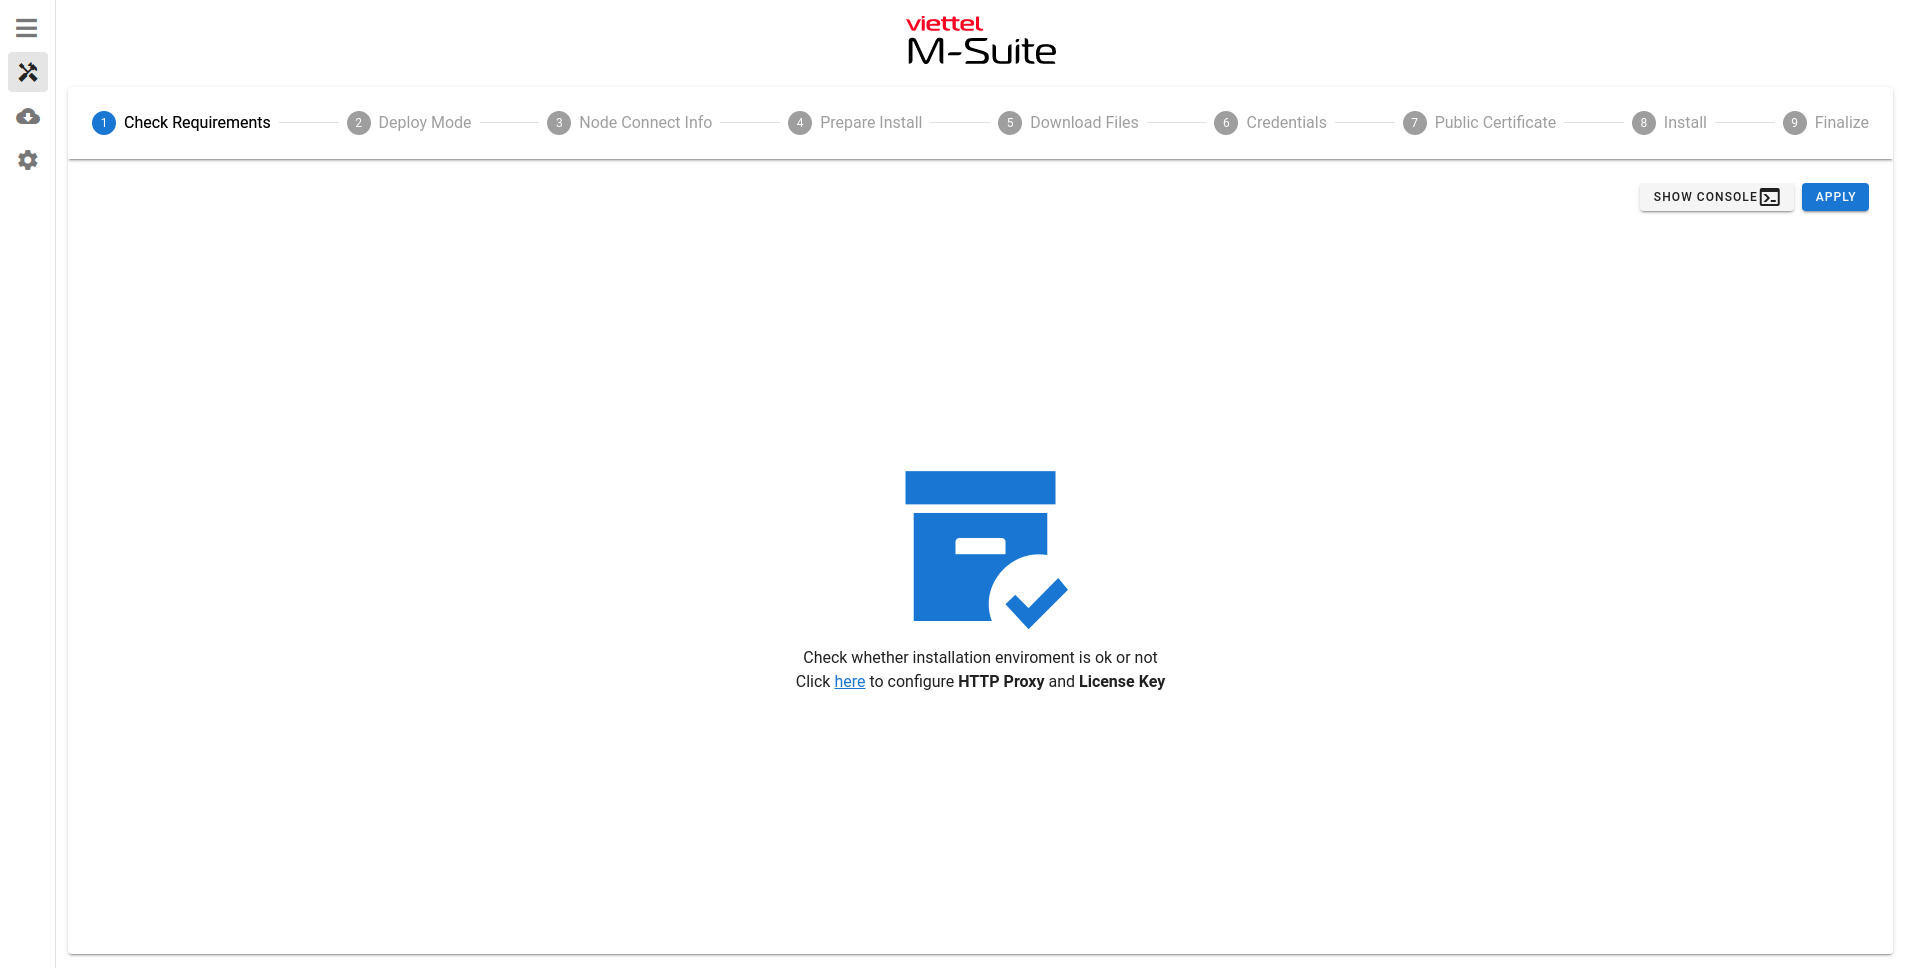
1.3.3. Màn hình cài đặt chính
1.3.3.1. Check Requirements
- Click Apply
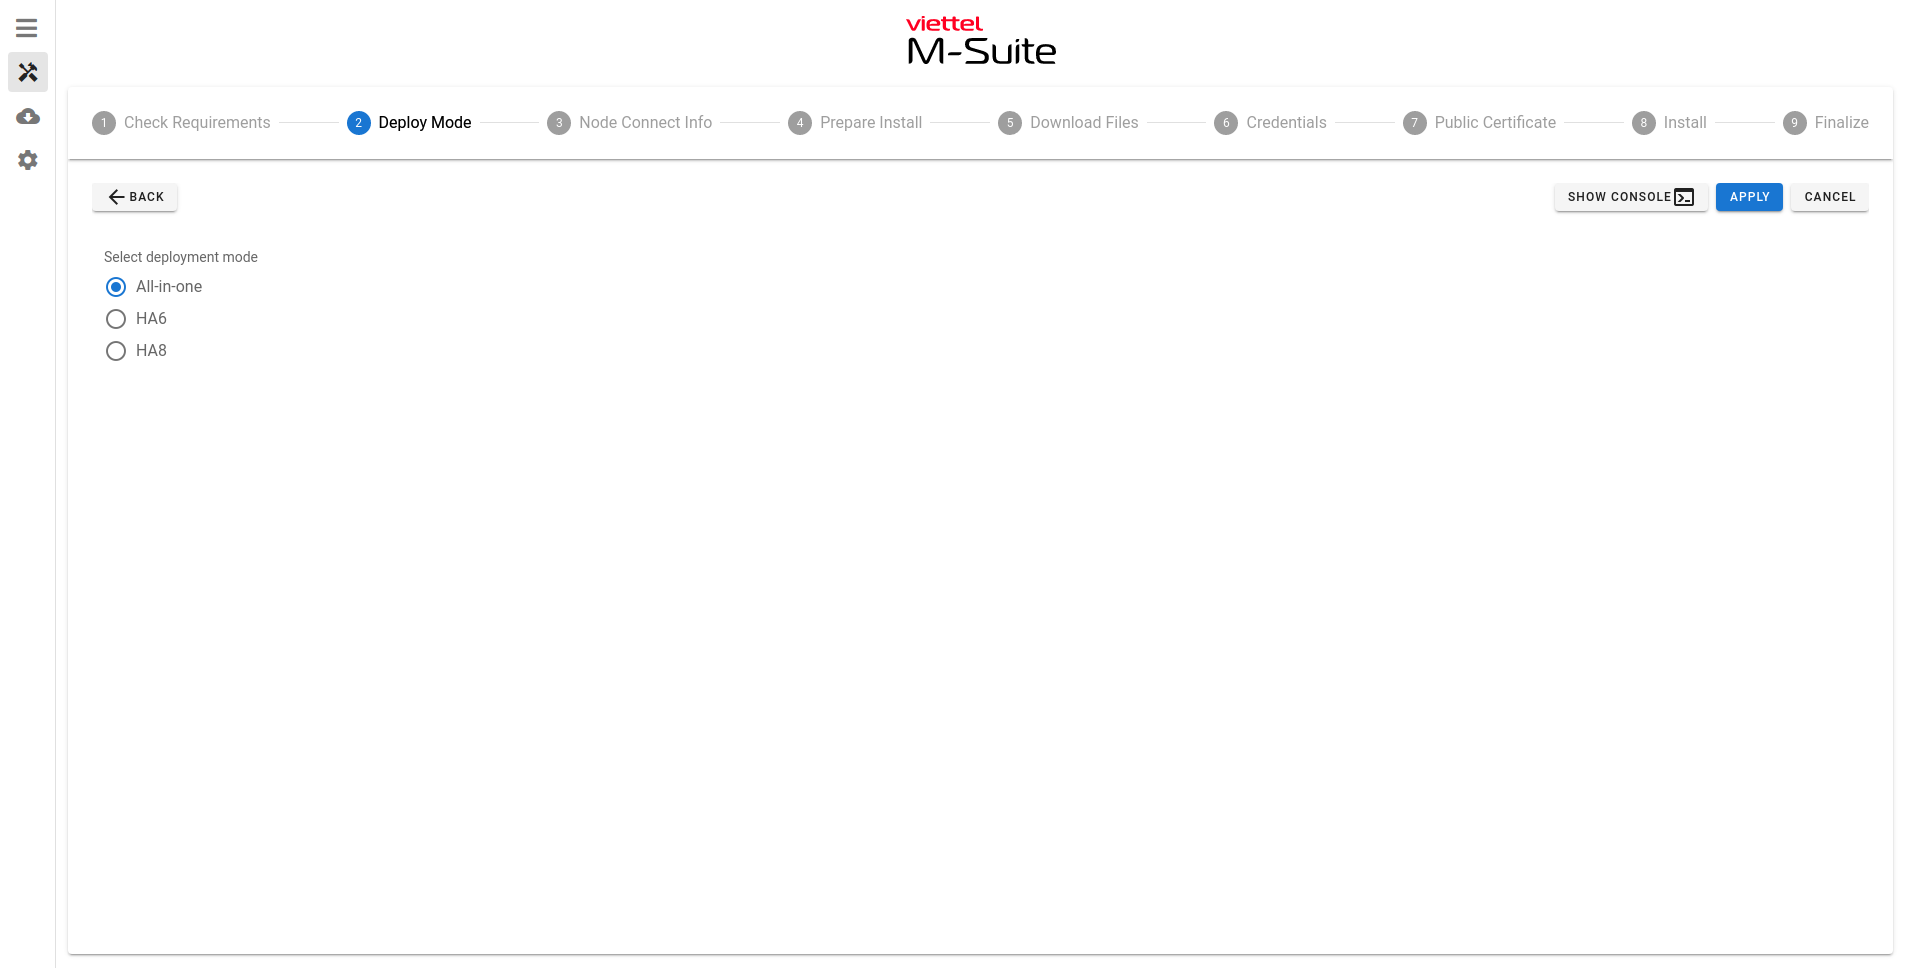
1.3.3.2 Deploy mode
- Chọn mô hình cài đặt
- Click Apply
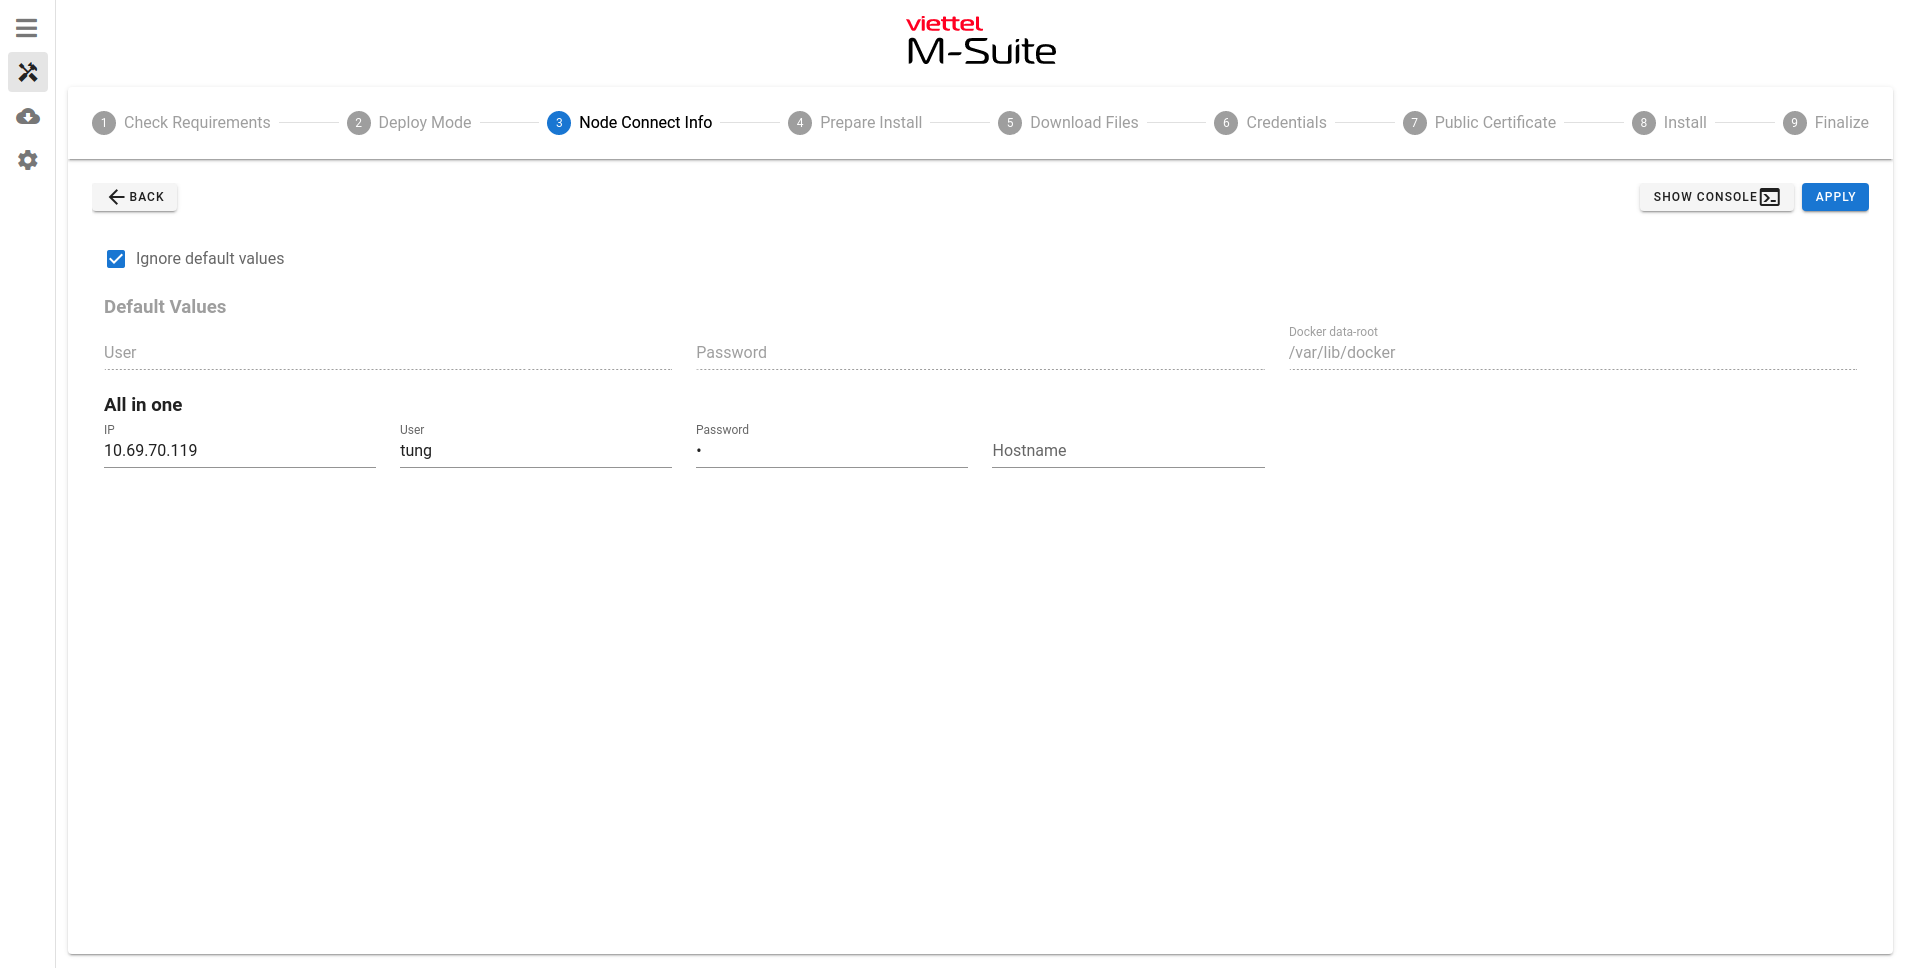
1.3.3.3. Node Connect Info
- Nhập các thông tin node tương ứng với mô hình triển khai
- Click Apply
Chi tiết các trường
- IP: ip của node
- User: user mặc định (có quyền sudo), với kiểu triển OVA thì được tự động điền giá trị là msuite
- Password: password của user trên, với kiểu triển khai OVA thì không cần phải nhập
- Docker data-root: thư mục lưu trữ data chính của node, với kiểu triển khai OVA thì được tự động điền với giá trị /u01/docker
- Proxy: proxy ra internet để cài đặt gói, với kiểu triển khai OVA thì không cần nhập
- Hostname: hostname của máy, bắt buộc với kiểu triển khai OVA
Chi tiết cấu hình các mô hình
- AllInOne
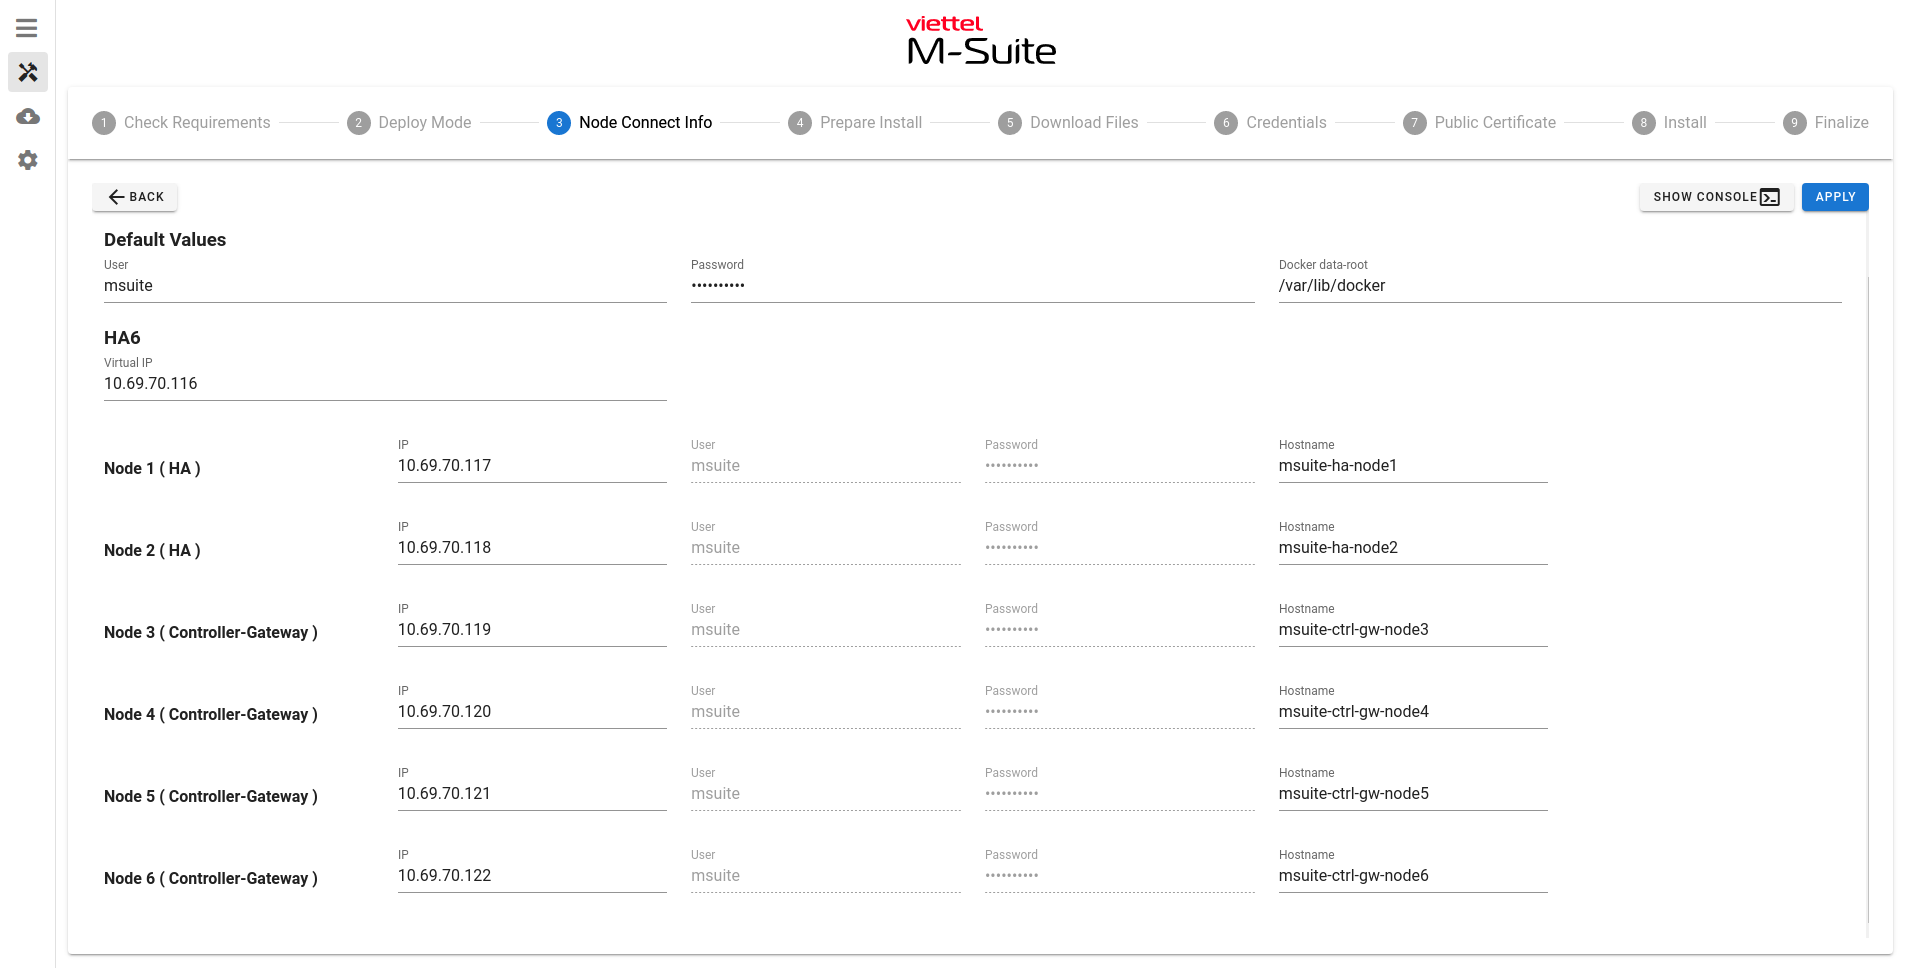
- HA6
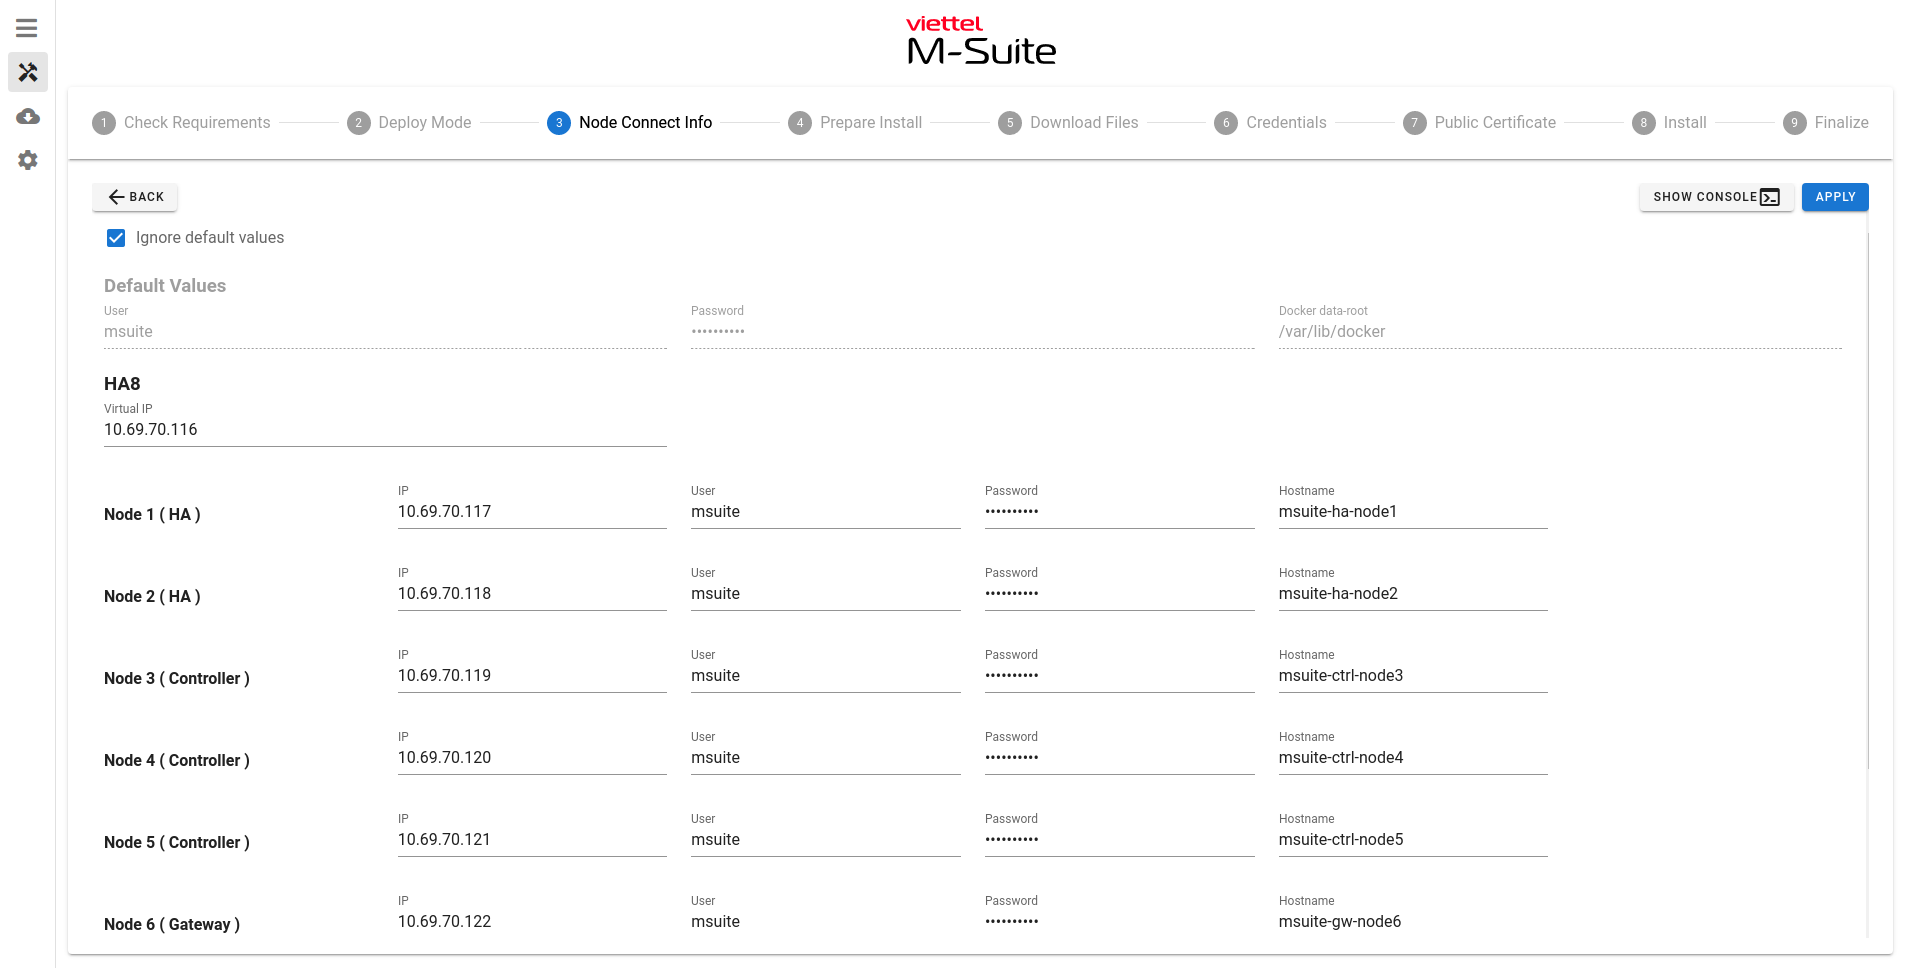
- HA8
1.3.3.4. Prepare Install
- Click Apply

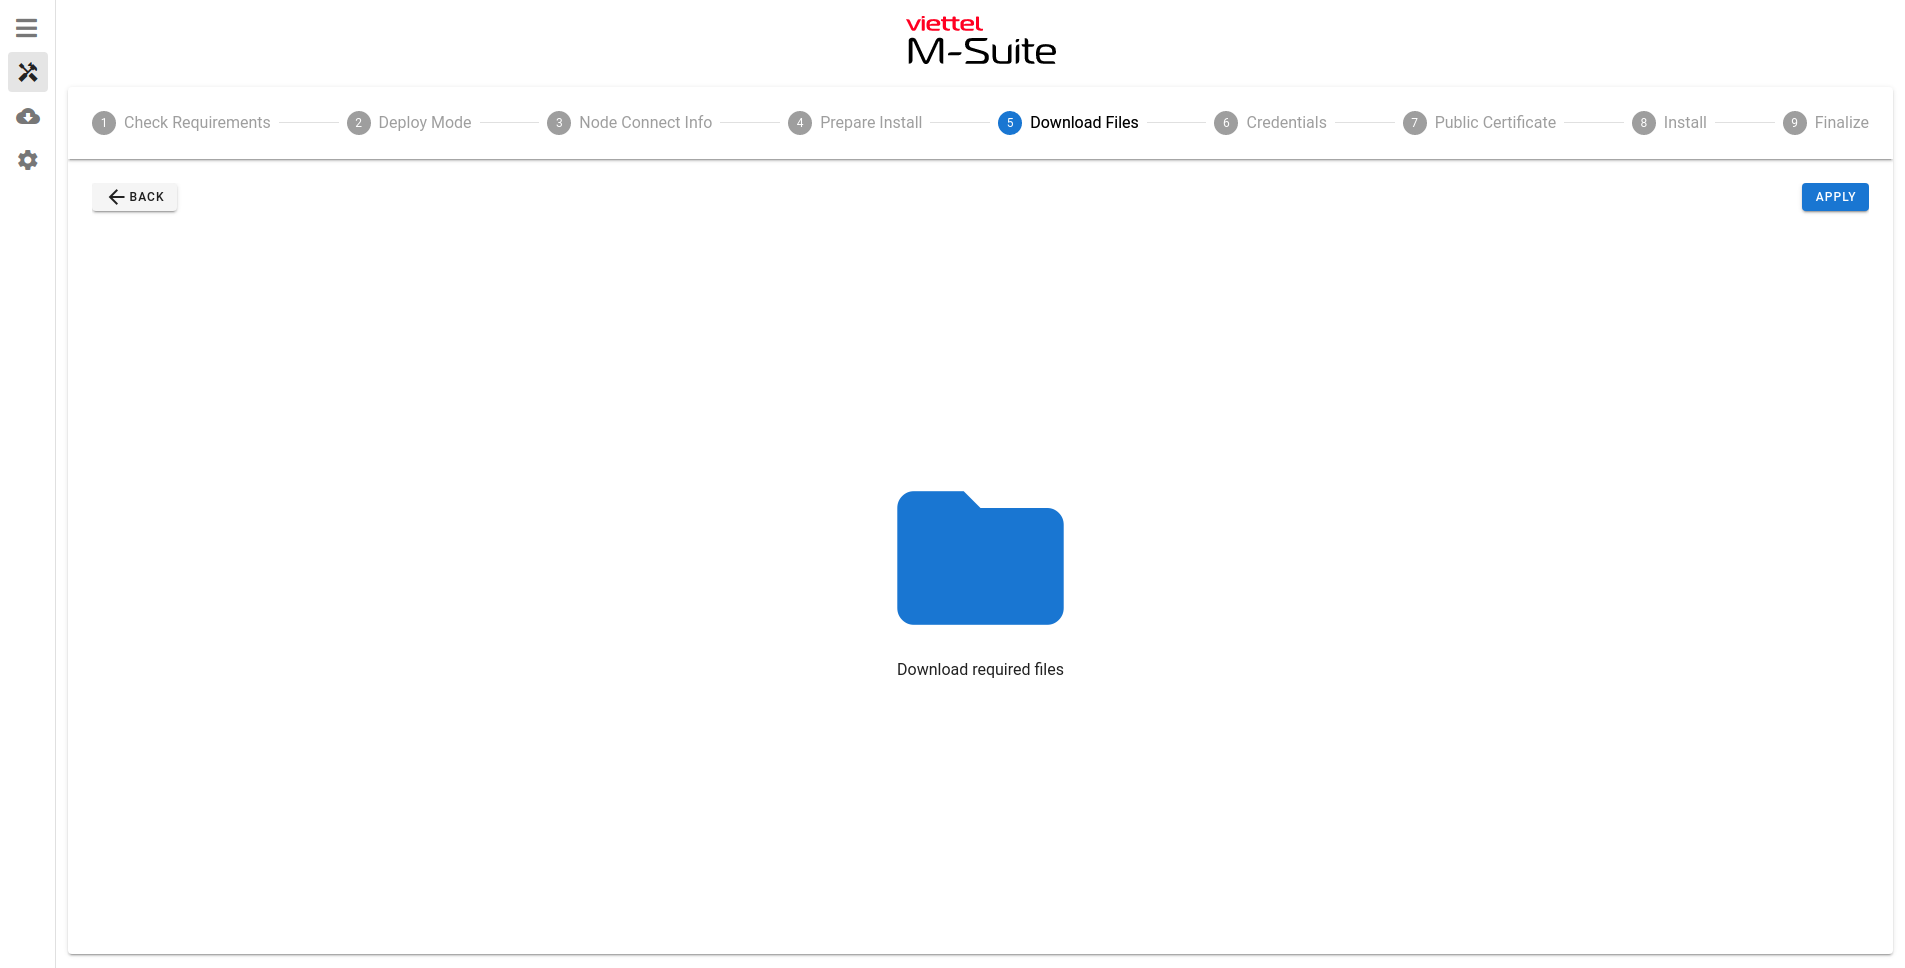
1.3.3.5. Download Files
- Click Apply
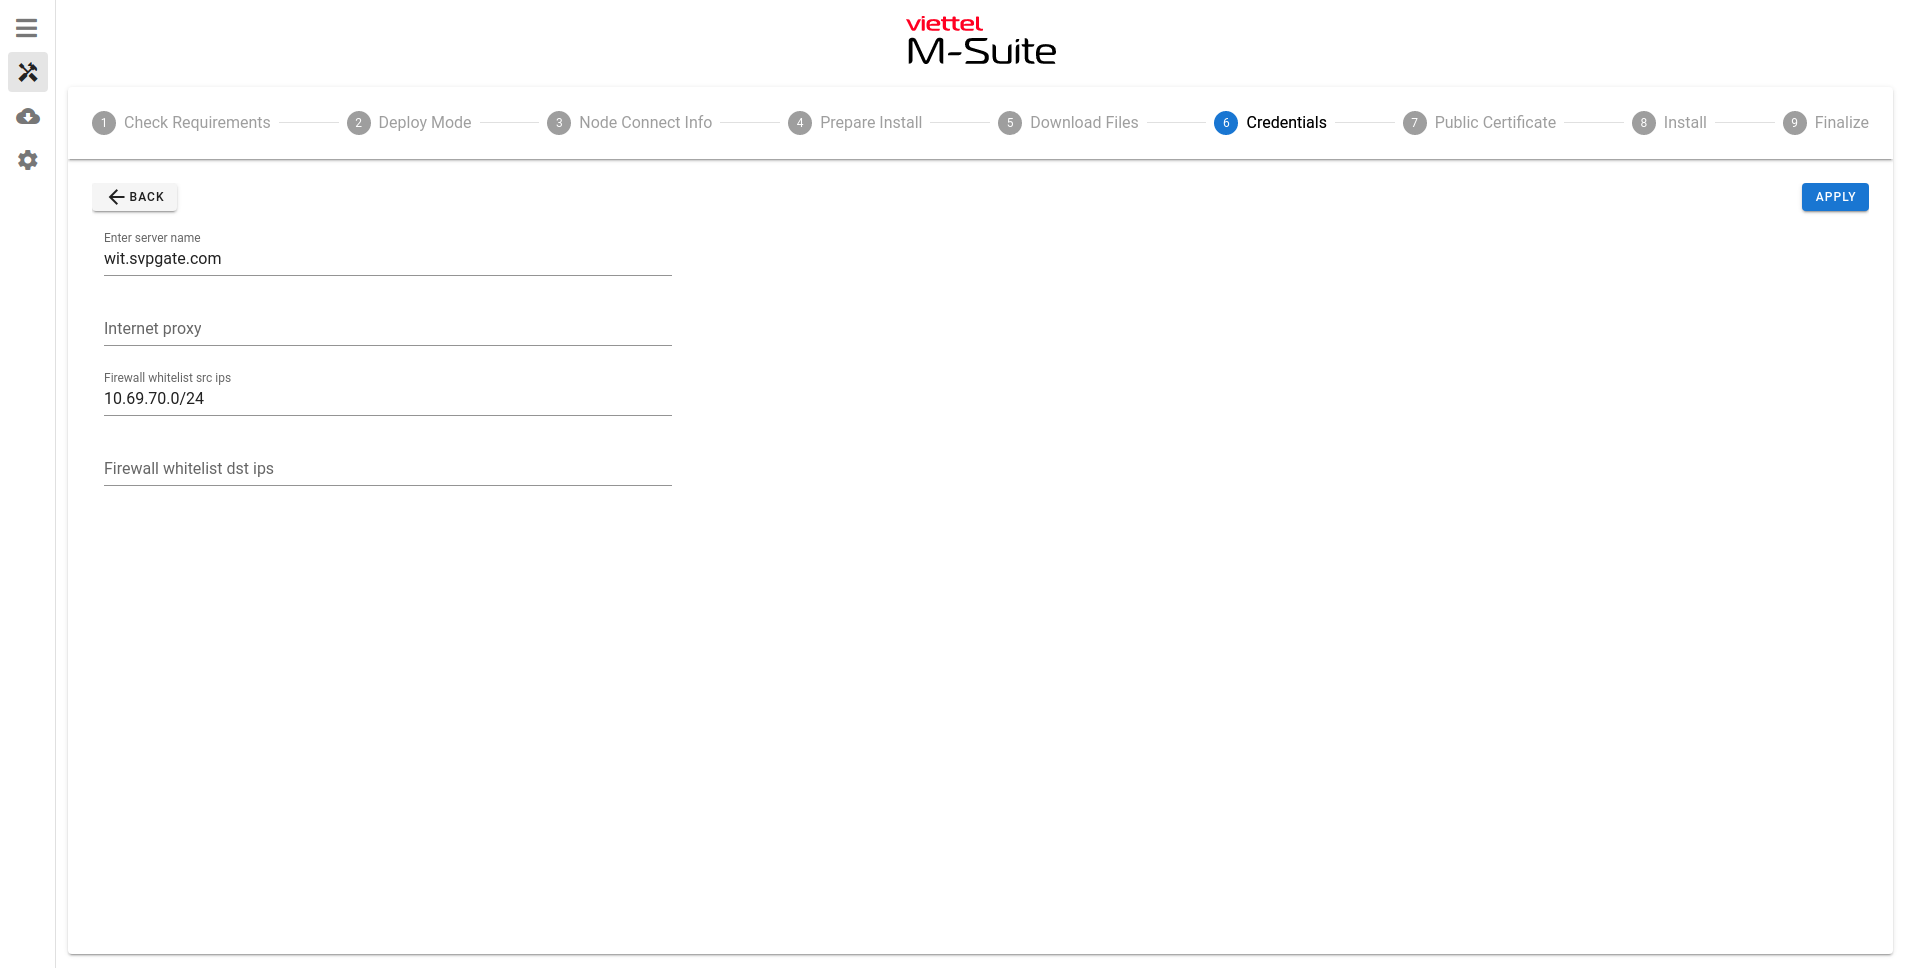
1.3.3.6. Credentials
- Nhập các thông tin tương ứng
- Click Apply
Chi tiết các trường
- Server name: public server name
- Internet proxy: proxy có quyền truy cập internet
- Firewall whitelist src ips: ip, dải ip có quyền truy cập full port của cụm server
- Firewall whitelist dst ips: ip, dải ip mà cụm server có quyền truy cập full port
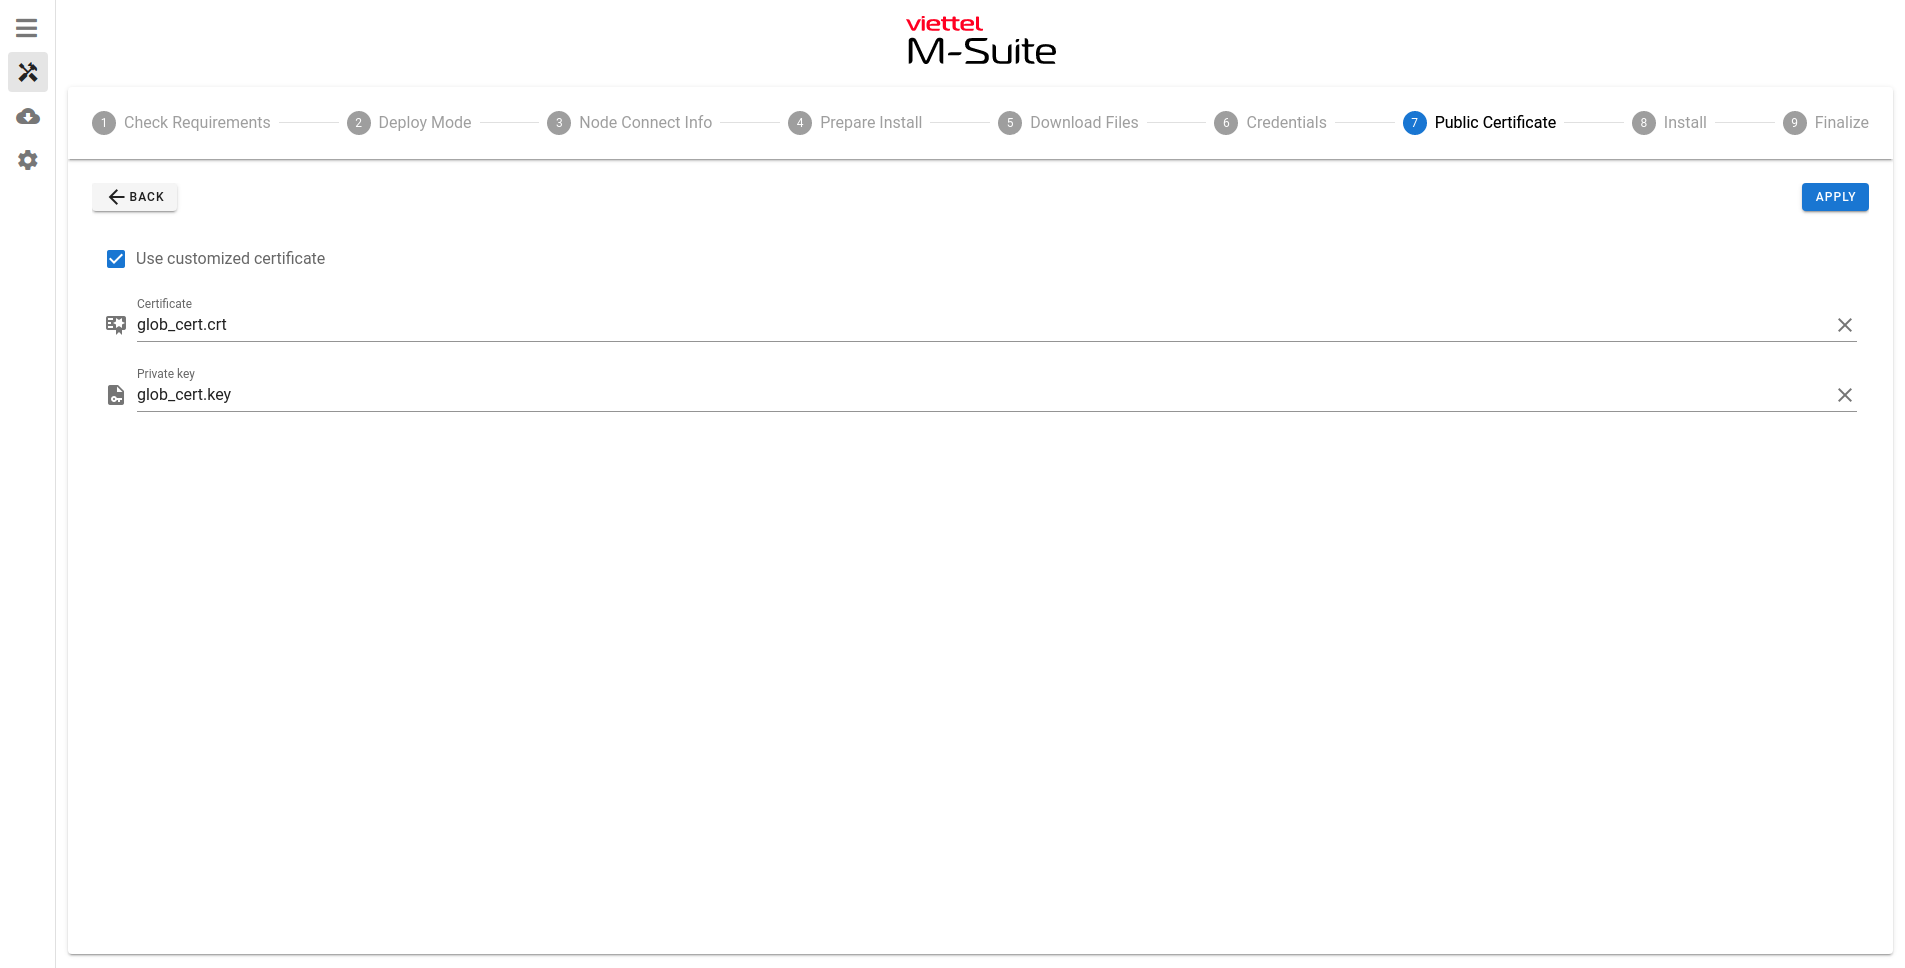
1.3.3.7. Public Certificate
- Chọn Use customized certificate
- Chọn các file certificate tương ứng
- Click Apply
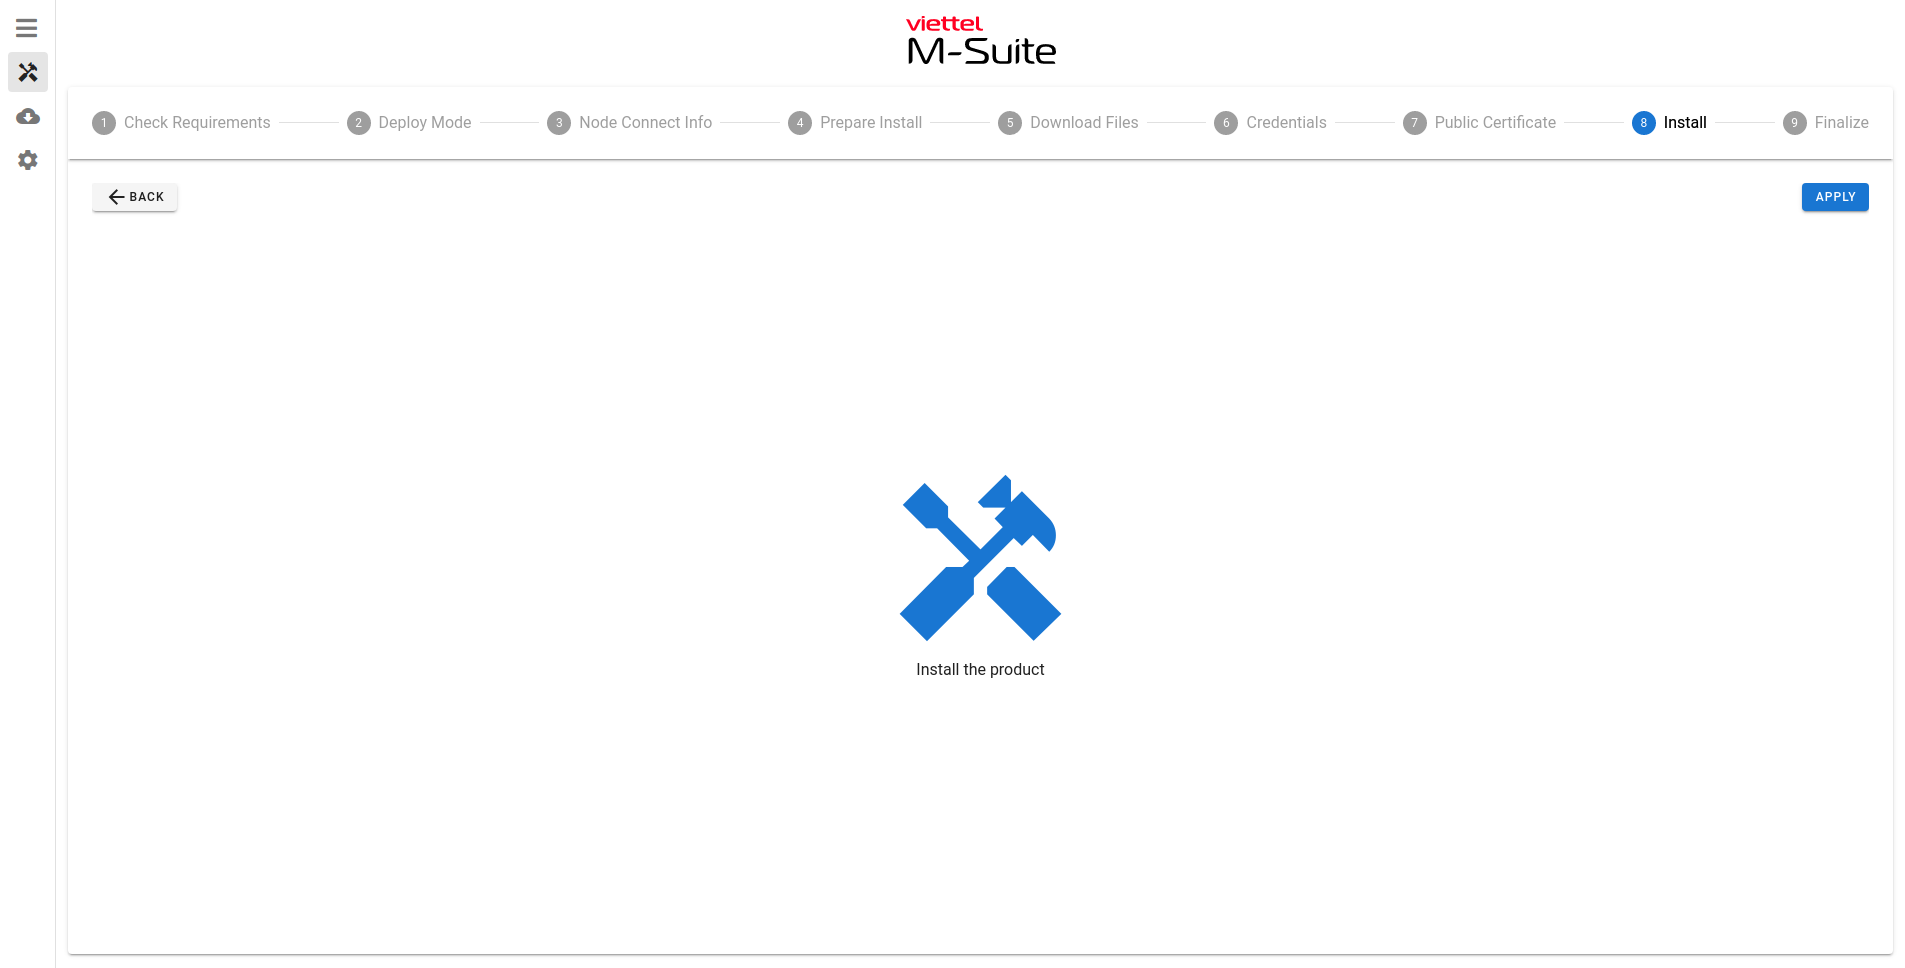
1.3.3.8. Install
- Click Apply
1.3.3.9. Finalize
1.4. Cấu hình hệ thống
1.4.1. Tạo tài khoản admin
- Khi truy cập admin portal tại http://$VIP_IP:9443, hệ thống sẽ hiển thị màn hình tạo tài khoản admin mặc định
- Nhập các thông tin để tạo tài khoản, click đăng ký, hệ thống sẽ chuyển đến trang đăng nhập
- Đăng nhập với thông tin tài khoản vừa tạo
1.4.2. Activate license
- Truy cập menu Setting - License
- Truy cập license.viettelcybersecurity.com, tạo license cho product mSuite
- Trên admin portal M-Suite, nhập License Key vừa tạo, hệ thống sẽ tạo ra 1 activation request code
- Trên trang license.viettelcybersecurity.com, nhập Activation Request Code sẽ nhận được 1 license file
- Trên admin portal M-Suite, nhập nội dung license file, click Offline Activate -> Activate thành công
1.5. Tích hợp hệ thống
1.5.1. Tích hợp AD
1.5.1.1. Tích hợp đồng bộ user
Làm theo HD trong HDSD
1.5.1.2. Tích hợp đăng nhập
Làm theo HD trong HDSD
1.5.2. Tích hợp đăng nhập Viettel SSO
Mở kết nối từ cụm server đến
10.255.58.201:8002Trên node triển khai
- Chạy lệnh
cd /opt/mobility-suite/swarm_manager/ cp -r ./extra-stacks/custom-viettel-authen-adapter ./ cd ./custom-viettel-authen-adapter- Sửa nội dung file defaults/main.yaml thành
logger: id: "root" type: common level: "" servers: http: listen_address: "${MS_GRPC_SERVER_HTTP_LISTEN_ADDRESS}" http_raw: true interfaces: http: authenticator: url: "https://10.255.58.201:8002/sso/v1/tickets" signing_key: "ahN47WHSA3-_I7wAcfQ7W2qyTKMeQrbDBYJQoENpGeTs8xLWddVPaMfqgC_e_UboPB9wJluMVC3M8CtoBKt7Ow" encryption_key: "rle6pMmf5eWeix5LHm2sil_aP8WWl3IB8RtMWsRw1vs" insecure_enabled: 1 logger: type: extended context_path: "logger" prefix: "Authenticator" logger: type: extended context_path: "logger" prefix: "HTTPHandler"- Chạy lệnh
./deploy.sh restartTruy cập Admin Portal > Settings > Authentication > Username Password Login
- Thêm 1 Provider với các thông số sau
- Name: Viettel SSO
- Enabled: true
- Type: Restful
- URL (lưu ý thay biến $VIP_IP): http://$VIP_IP:9999/custom-viettel-authen-adapter/login
- Method: POST
- Click Save
1.5.3. Tích hợp SMS Gateway
[TO_BE_DONE]
1.5.4. Tích hợp DNS Server
Làm theo HD trong HDSD
1.5.5. Tích hợp Email SMTP Server
Làm theo HD trong HDSD
1.5.6. Customize firewall rules
- Truy cập vào folder
- Với các server HA:
cd /opt/mobility-suite/lb/sdp-controller-firewall
- Với các server còn lại
cd /opt/mobility-suite/nonlb/sdp-firewall
- Kiểm tra cấu hình mặc định hiện tại, xem các giá trị MS_FIREWALL_WHITELIST_SRC_IPS, MS_FIREWALL_WHITELIST_DST_IPS
cat ../deploy.env
- Để whitelist theo ip, edit file deploy_ext.env, copy các giá trị kiểm tra được ở trên sang, chỉnh sửa phù hợp theo yêu cầu
MS_FIREWALL_WHITELIST_SRC_IPS=1.1.1.1,2.2.2.0/24,3.3.3.3
MS_FIREWALL_WHITELIST_DST_IPS=4.4.4.4,5.5.5.0/24,6.6.6.6
- Để chỉnh sửa nâng cao
- Chạy lệnh
mkdir -p defaults.ext
cp defaults/watch_and_reset_ip_rules.sh ./defaults.ext
- Chỉnh sửa file defaults.ext/watch_and_reset_ip_rules.sh đáp ứng yêu cầu
- Chạy lệnh
./deploy.sh restart
- Chạy lệnh để kiểm tra
iptables -L -n
1.6. Kiểm tra
Kiểm tra theo checklist ở mục 3.1
2. Cập nhật hệ thống
Truy cập https://$IP:9777 với $IP là IP của node AllInOne hoặc node3 trong chế độ HA6 và HA8
Đăng nhập nếu cần thiết
Truy cập menu update
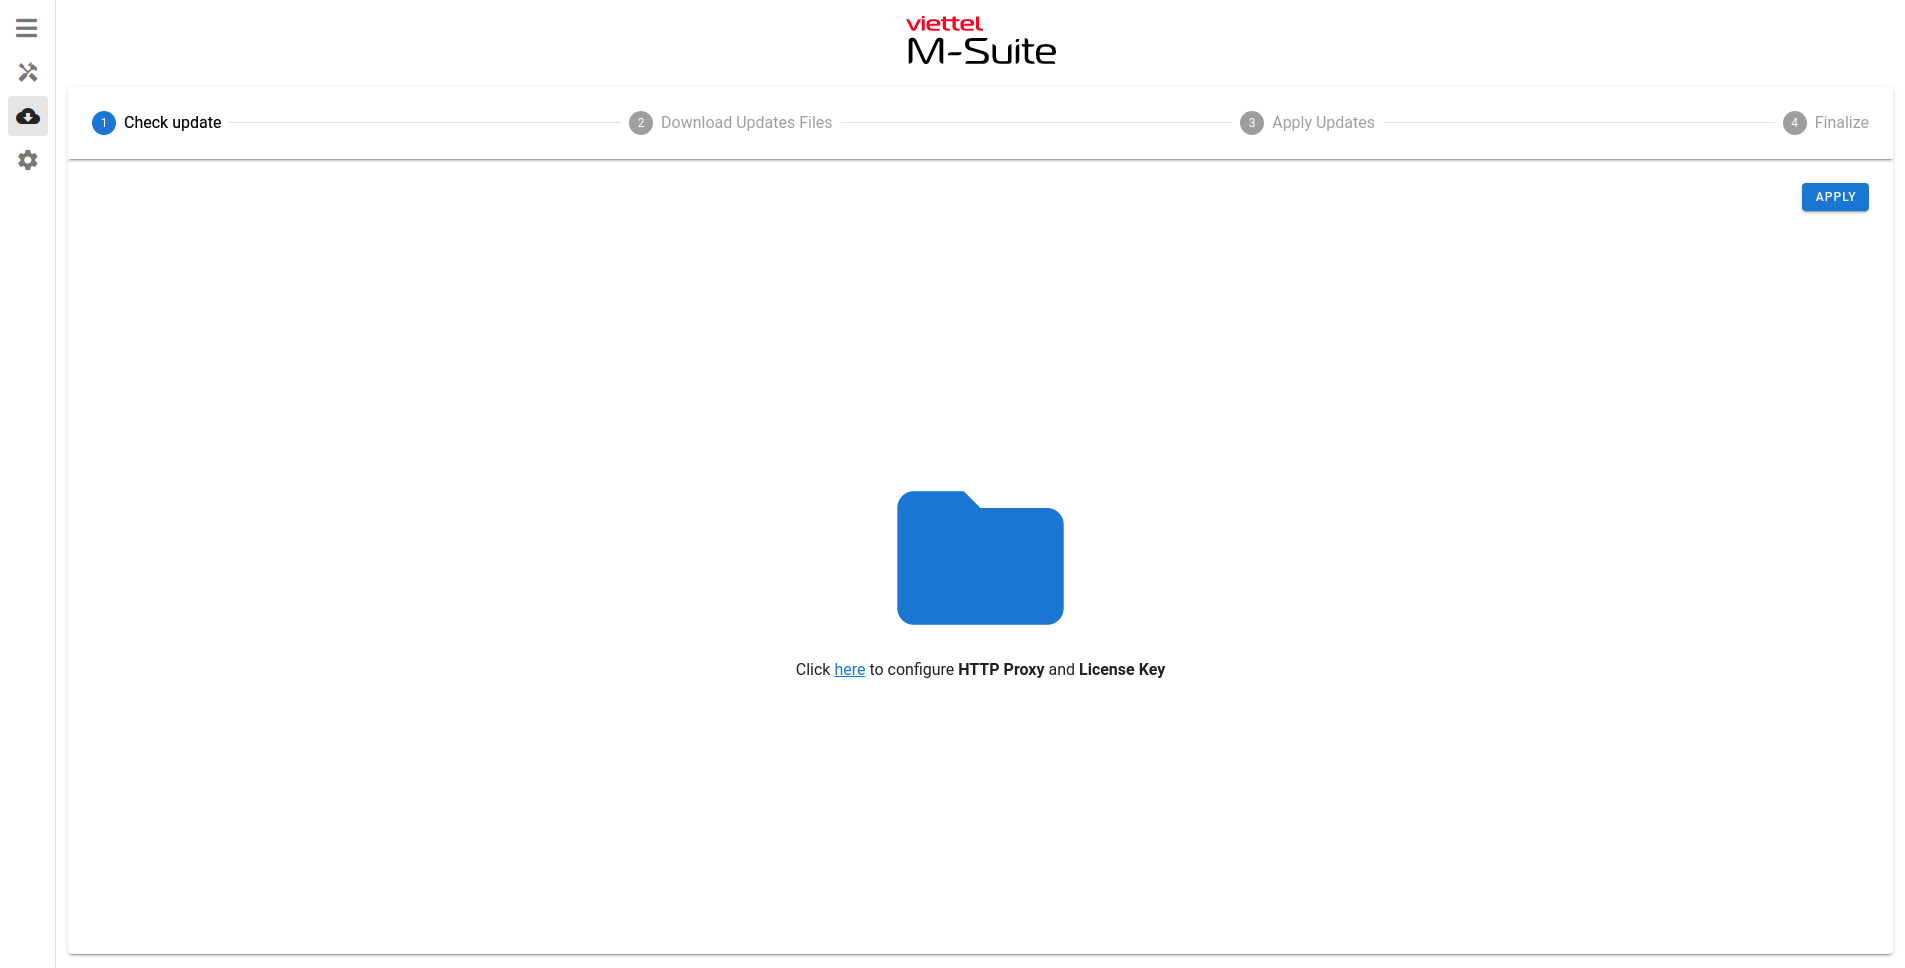
2.1. Check Update
- Nhập Http Proxy, License Key
- Click Apply
Chi tiết các trường
- Http Proxy: Internet proxy có thể truy cập tới https://hub.viettelcybersecurity.com https://notary.viettelcybersecurity.com
- License Key: override license key đã được activate của hệ thống
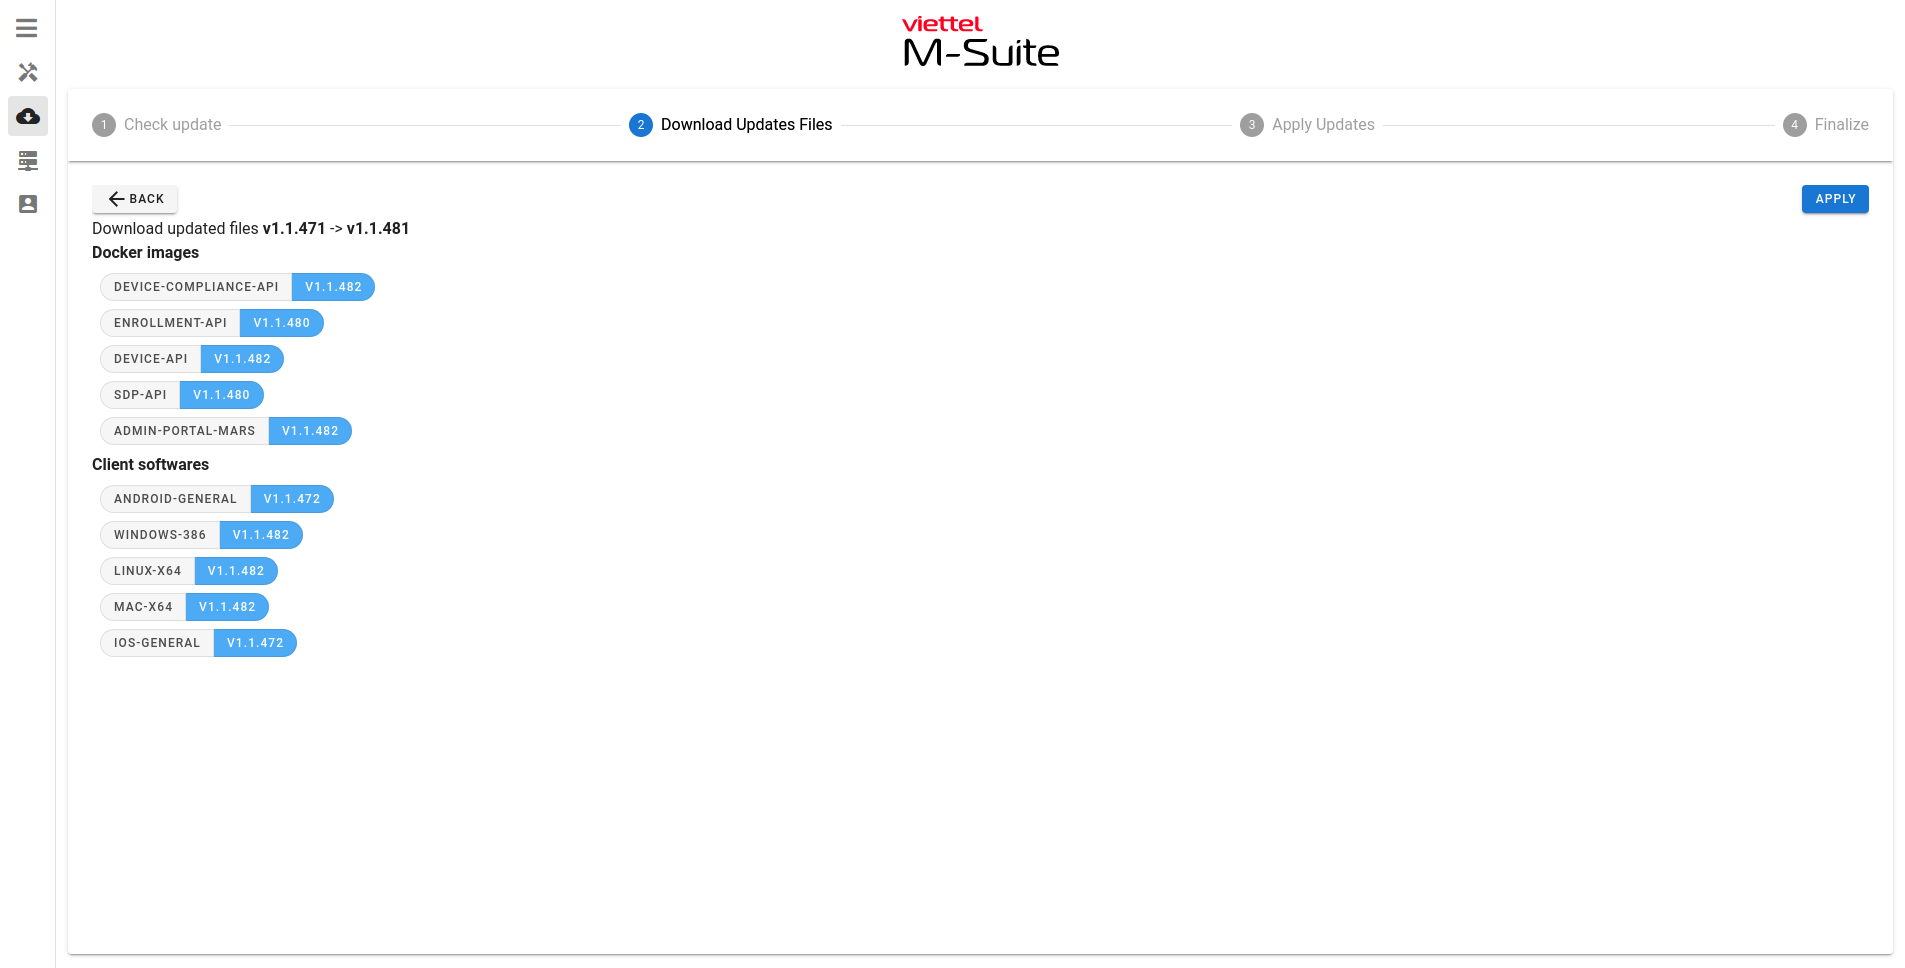
2.2. Download Updates Files
- Click Apply
2.3. Apply Updates
- Click Apply

2.4. Finalize
Kiểm tra theo checklist ở mục 3.1
3. Phụ lục
3.1. Checklist sau cài đặt / cập nhật
| Thực hiện | Kết quả |
|---|---|
Từ node triển khai , chạy docker service ls | Các service chạy đúng số lượng x/x, không tính các service sau minio_init |
Trên từng node, chạy docker ps -a | Không có container nào bị stop / start liên tục |
| Truy cập vào Admin Portal, chạy thử các nghiệp vụ admin | Các nghiệp vụ chạy bình thường |
| Chạy agent thử kết nối vào các app nội bộ | Các nghiệp vụ chạy bình thường |
| Với mô hình HA, stop 1 server vật lý bất kì, rồi kiểm tra các nghiệp vụ trên Admin Portal, Agent | Các nghiệp vụ chạy bình thường |